

Head Gasket Repair: Essential Steps and Considerations for a Successful Fix
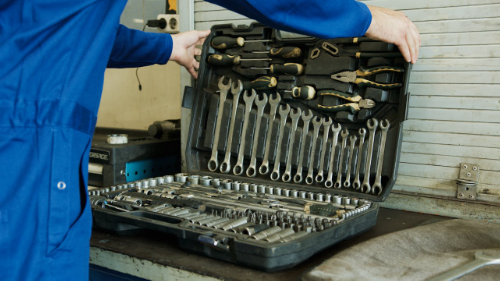
Written By : Serene Before diving into repair procedures, it’s important to understand what a head gasket does. It sits between the engine block and the cylinder head, playing a vital role in maintaining engine pressure and keeping fluids separate. This separation is crucial for the efficient operation of the engine, as any breach can lead to severe issues such as overheating or engine knocking. The head gasket also helps maintain the compression required for the engine to function optimally. Thus, understanding its role is the first step in addressing any potential problems. Signs of a Blown Head Gasket Recognising the symptoms of a blown gasket early can save you from further damage. Common signs include: Overheating: If your engine temperature is consistently high, it might indicate a problem. This is often due to coolant leakage, which reduces the system’s ability to manage heat effectively, leading to potential engine damage if not addressed. White Smoke: White smoke from the exhaust can be a sign that coolant is leaking into the combustion chamber. This smoke is often accompanied by a sweet smell, indicating that antifreeze is burning along with the fuel. Milky Oil: Check your oil dipstick. If the oil looks milky, it might be contaminated with coolant. This mixture compromises the oil’s lubricating properties, which could lead to increased engine wear and damage over time. Loss of Power: A noticeable drop in engine performance is often a symptom. This occurs because a blown gasket can disrupt the compression process, leading to inefficient fuel combustion and decreased engine output. Preparing for the Repair Safety First Safety should always be your top priority when working on your vehicle. Wear protective gear like gloves and goggles, and ensure that your workspace is well-ventilated. Always disconnect the battery before starting work to avoid any electrical hazards. Additionally, ensure that the vehicle is on a stable surface and use appropriate jacks and stands to prevent accidental slippage. Taking these precautions can prevent injuries and create a safer environment for conducting repairs. Gather Necessary Tools and Parts Having the right tools and parts on hand can make the repair process smoother. Here’s a list of essentials: Socket set: A comprehensive set will allow you to tackle various bolts and fasteners throughout the repair process. Torque wrench: This tool is critical for ensuring bolts are tightened to manufacturer specifications, preventing leaks or damage due to over-tightening. Head gasket set: Ensure you have the correct gasket set for your vehicle make and model to avoid compatibility issues. Engine coolant and oil: Fresh fluids are necessary to replace those drained during the repair process, ensuring optimal engine performance. Repair manual for your specific vehicle model: This manual provides detailed instructions and specifications necessary for a successful repair. Step-by-Step Head Gasket Repair Step 1: Drain the Fluids Begin by draining the engine oil and coolant. This prevents any spills when you remove the cylinder head. Make sure to dispose of these fluids properly, as they can be harmful to the environment. Use a catch pan to collect these fluids and take them to a designated recycling center. Proper disposal is crucial, as improper handling can lead to environmental contamination and potential legal penalties. Step 2: Remove the Cylinder Head Carefully remove all components attached to the cylinder head, such as the intake and exhaust manifolds, and the valve cover. Keep track of any bolts and parts to ensure you can reassemble them correctly. It’s helpful to label each component and its corresponding hardware, which can simplify the reassembly process. Taking photos during disassembly can also serve as a visual guide when putting everything back together. Step 3: Clean the Surface Once the cylinder head is removed, clean the surface of the engine block and the cylinder head thoroughly. Any residue or debris can prevent a proper seal, leading to future leaks. Use a non-abrasive cleaner and a gasket scraper to ensure a smooth, clean surface. This step is crucial as even the smallest particle left behind can compromise the seal of the new gasket. Step 4: Inspect for Damage Inspect the cylinder head and engine block for cracks or warping. If the damage is beyond a simple gasket replacement, you may need professional machining or even a replacement. Use a straight edge and feeler gauge to check for warping, and visually inspect for cracks. If you are unsure of the extent of the damage, consulting a professional can provide clarity and prevent future issues. Step 5: Install the New Gasket Position the new gasket on the engine block. Ensure it aligns perfectly with the bolt holes and other openings. Follow the torque specifications in your vehicle’s repair manual to tighten the bolts in the correct sequence. This step is critical to prevent leaks and ensure proper engine function. Tightening in the correct sequence ensures even pressure distribution across the gasket, preventing warping or damage. Step 6: Reassemble the Engine Reattach all components you removed earlier, including the manifolds and valve cover. Ensure all bolts are tightened to the correct torque settings to avoid leaks. Double-check all connections and hoses for secure attachment, as loose components can lead to operational issues or further damage. Taking your time during reassembly can prevent mistakes and ensure a successful repair. Step 7: Refill Fluids and Test Refill the engine with new oil and coolant. Reconnect the battery and start the engine. Check for any leaks and monitor the engine temperature closely. Let the engine idle for a while and observe the temperature gauge to ensure it remains stable. A brief test drive can further confirm the success of your repair and highlight any potential issues that may need addressing. Considerations for Successful Repair Manual Handling Tips Handling heavy engine parts requires care to prevent injury. Lift with your legs, not your back, and use a dolly or hoist if necessary. If a part feels too heavy, don’t hesitate to ask for help. Proper lifting techniques are crucial in preventing back injuries and ensuring